NBA 2K24 Best Shooting Settings
Shooting is one of the core fundamentals of basketball. It is a skill that players spend their whole lives refining. And, of course, in a game such as NBA 2K24, good shooting can mean the difference between overwhelming victory, and crushing defeat. The way that you have setup your Shooting Setting in the game play a large part in this. Needless to say, you will want to have these calibrated for maximum efficency. But, with so many different Settings in the game, you may struggle with setting this up just right. To help you get the best Shooting Settings in NBA 2K24, we’re going to show you how you can set all of these up to get the absolute best shooting results in the game.

Best Shooting Settings for NBA 2K24
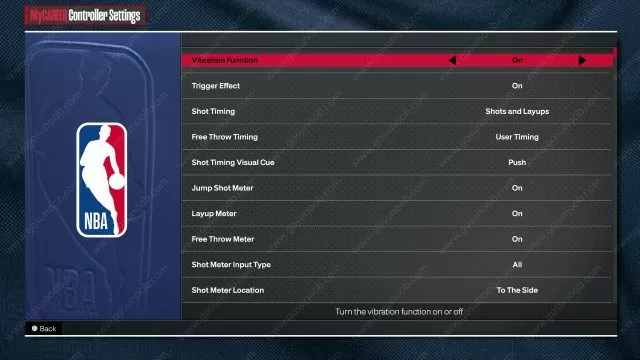
The first thing you need to do is to go into Options, and from there – into Settings. The first option that you will want to change here is Shot Feedback. Set this to User Only. This indicator will let you know if you have timed your shots early, late, or right on time. Next up, go into Controller Settings. This is where we’re going to mess around with quite a few settings.
Vibration – keep it turned On. Next, Shot Timing. Set this to Shots and Layups. As for Free Throw Timing, you can set it to User Timing. The Shot Visual Cue is one of the most important Shoot Settings in the game. We recommend that you set this to Set Point. But if this is not working for you, try the other options here as well until you get it to a setting you feel most comfortable with. Also, you will want to turn your Jump Meter to Off. This is because your Shot Meter green window size is going to be 20% bigger with it off. On the other hand, the Layup Meter should be On. Finally, Shot Meter Location – to the side works best.

